Showing posts with label fabric. Show all posts

Monday, August 4, 2014

DIY Tea Towel Art


As you probably already know, Ryan and I moved into a new apartment back in February. Which means we've almost been there for 6 months already! I cannot quite wrap my head around this because there are still so many projects and things to do [including organizing the entire closet in our guest room, among other things]. One of the things we have yet to do is hang up art. Sure, we have a couple token things here and there, but most of our walls are pretty bare.

I don't think I ever really realized how tricky it is deciding on wall art. I mean, you're going to see it everyday. It just seems like such a big commitment. And for the past 6 months, I hadn't come across anything that I really wanted to look at everyday. Until we went to Sweden, that is!

I found these adorable Scandinavian printed tea towels while we were in Gamla Stan, Stockholm. At the time, I didn't expect to frame and hang them, but after getting home and trying to decide what to do with them I thought hanging them up was the perfect idea for our little dining room! 

So here they are, in all their glory:


Little fishies!

Lands of Sweden

And my fave, kitchen condiments:

They really brighten up the dining room, and I love the reminder of Sweden when I look at them!


Do you have a cute tea towel laying around? Make some wall art!

You will need:

Poster frame (I used this one from IKEA)
Tea Towel (Etsy has some cute ones, so does Amazon)
Spray starch + iron

To begin, iron the crap out of that tea towel. They love to wrinkle. I ended up buying starch (which I had never once used before in my life) to make sure all those pesky wrinkles came out. I tried it first without the starch, but once they were framed I kept noticing all the wrinkles that didn't come out and it drove me nuts. Trust me, you don't want to skip the starch!

Flip your frame over and follow the manufactures' directions for disassembling and reassembling. Lay your tea towel, facing outward, on the glass. Smooth out and make sure it's laying evenly and centered. Place the white paper over the tea towel and refasten the back of the frame securely. If you have a loose frame, you may want to tack the upper corners of your towel in place. The frames I used were extremely tight so I didn't have an issue with it.

Decide where to hang your new wall art!

Sunday, March 10, 2013

Fabric galore!!!

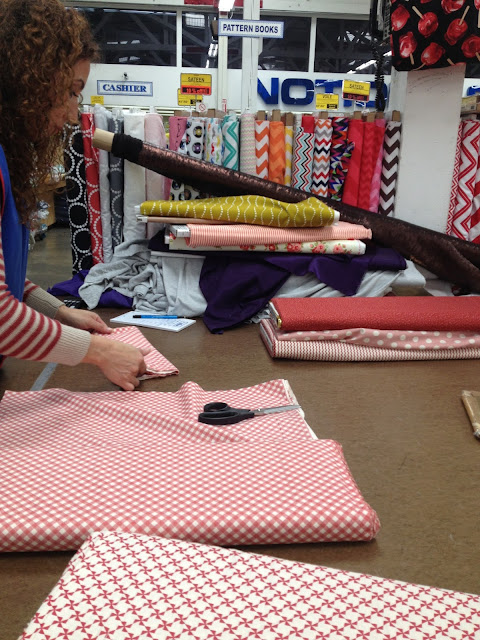
I was in a little part of heaven this weekend.  My sister and I had our 3rd sister craft day and we ventured to the fashion district of LA to track down some seriously cute fabric. Mission accomplished. 

My good friend, Jo, told me about the amazing fabric store known as Michael Levine. Holy cow is it amazing. Overwhelmingly amazing. I only wish I had remembered to put my memory card back in my camera so the pictures below would do it justice.

Look at all that fabric!!! And that's just one section of the store!

 Caryn with our bolts of red fabrics for the advent calendar.

 Jo starting the decision making process with her fabric choices.

 Me realizing that not only do they carry a vast amount of fabric, but yarn too!!

"There's nothing like the feeling of fresh cut fabric!"

And here below are the final five that made the cut:

And what's a girl to do when she sees some blue and yellow (the picture makes the yellow fabric look a little green-ish, I promise it's yellow in real life) adorable fabric that coordinate so well?! I already have a few projects in mind for this color/pattern combo...


All in all, the day was a raging success.


Time to get some crafting on. Happy weekend.

Sunday, March 3, 2013

DIY heat pack

I have been meaning to make a quick, rice-filled, heat pack for quite some time now and today was the day it finally got made.  After one too many instances of needing one and not having one on hand, I finally perused through my fabric stash and decided to use this old Swedish fabric calendar as the fabric.

I forgot to take a picture of the calendar before I cut it up...so here it is just pieced together. 


A short while later and here it is! Filled with rice and sectioned off into 4 rectangles.  You can microwave the entire pack and the rice retains the heat.  Voila. Cheap DIY heat pack. I used this tutorial from the blog Fellow Fellow. I love that I finally found something to use the calendar for! 


It's been a great weekend.  I can't believe it's already Monday tomorrow. My how time flies. And it's March already?! Wow.  

Hope all is well!

Sunday, November 18, 2012

Shibori Indigo Class

This weekend I got to take an amazing Shibori Indigo class with Glennis Dolce for my birthday (thank you Ryan and fam!) and it was incredible! I have never dyed with indigo before and it was so fascinating.  Did you know the indigo dye is actually greenish-yellow when in its dye form and it doesn't turn into the beautiful blue until it becomes oxidized?! I definitely had no clue until yesterday.

Below is one of my favorite dyed indigo swatches from class.  It was directly from Japan and quite intricate.


Here is one of the vats of the dye:


Here are our pieces drying after dying:


More pieces out to dry:


This is one piece I did that I tried to add a Scandinavian touch to. :-)  I used a picture of some Rosemaling as inspiration and broke it down into a basic design.  Then I used a folded running stitch before dying.  It was time consuming and tedious, but I am glad I gave it a go.


 The piece above was done on linen. I loved the linen the most of all the fabrics we got to work with.  We also got to work with bamboo batting, raw silk, different cottons, silk noil, hemp, antique trims, and a couple other fabrics that I don't remember the names of.


And after class, I compiled a few of my favorite swatches and threw them into a frame for fun.  We had this frame around from Goodwill last year so I flipped the art around and arranged my swatches on the other side.  Ryan has coined it, "Color study #1". 

[sidenote: sorry for the dark, glare-y photo]


Overall, I learned a ton and met some really fun people.  A success! 

Happy almost Thanksgiving!!

Friday, November 2, 2012

We're in!

Great news! Beth and I are officially accepted to the 2012 Los Angeles Swedish Christmas Fair (aka Lucia festival)! Woooooo!  We are so stoked and have been frantically creating and brainstorming things to make.  

My mom sent me some awesome supplies to get me started (thanks, mom!), including the adorable fabric you see below (direct from the motherland) and that cute ribbon too.


And she has the really cool cookie stamps in different Scandinavian shapes that I used to make ornaments with.  Below is one of St. Lucia.


She also sent stamps of a Dala horse, snowflake, advent candle, and heart.  I used them to stamp into a preservable dough (tutorial to come later), then cut them out with an antique biscuit cutter Ryan and I found at an antique shop in Paso Robles a month back.  I will get better pictures of them later to show you all.  After the fair, I will put some up in my Etsy shop too, so stay tuned!


And I also made these little guys from some cinnamon dough.  I used my IKEA cookie cutters and poked holes with a straw.  They smell amazing!


I've made a few other things too, but haven't had time to take photos yet.  More to come!

And speaking of Scandinavian Christmas things, I still have a few slots open for guest bloggers for the Scandinavian Christmas series this year if you'd like to join! Or, if you know of someone who would like to, please have them email me.  

Happy Friday!

Tuesday, February 14, 2012

A dress for a baby

First, Happy Valentine's Day!  Hurry for a day dedicated to eating chocolate and getting flowers!  I know I will definitely be eating my fair share of sweets today, I hope you do too.

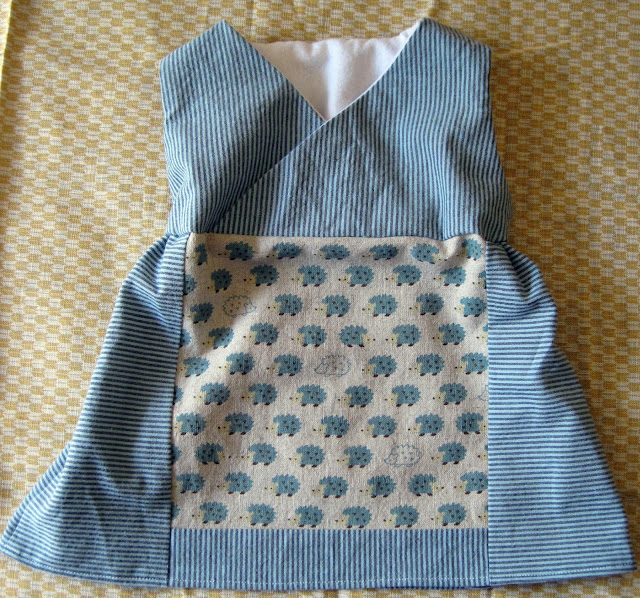
Ok, back to sewing and crafting.  I made this wee little baby dress from Anna Maria Horner's book, Handmade Beginings, the dress is called the Pretty-as-a-Picture Dress.  A number of our friends are having babies in the near future and I thought I'd get a head start on some baby gifts! 

It uses one fabric to showcase the design in both the front and back of the dress.  I had this adorable porcupine fabric that I found in Japan and figured this would be a great use for it!


Back view: You can see how the elastic around the waistband (except for the front panel) gives the dress some cute gathers.


Front view:


And side view:


This was a great day project.  I started it in the morning and finished after lunch, with many coffee breaks in between.  I am loving Handmade Beginings, it has adorable projects for every aspect of parenthood: from diaper bags to maternity clothes to baby toys, a great range of things to create.

And if you're looking for a fun Valentine's day craft try making your own paper hearts with this tutorial:


Happy Chocolate Valentine's Day!

Wednesday, November 2, 2011

Major craft fail

I was so excited about this project before I started and then the more and more that went into it the more and more I didn't like it. I was attempting to make a Fall wreath by taking a straw wreath (cheap) and hot gluing split peas all over it. I saw quite a few like it when I googled "diy fall wreath".

So I bought some new hot glue and got started. Word to the wise, do NOT buy RoseArt brand hot glue, it is awful. I did a section with teh glue I had and it worked great and as soon as I switched to this glue things started going downhill, fast.


I started gluing the split peas on...

And one by one they kept falling off when I switched to the other hot glue.


You can see the section on the right side where they are sticking, that was from my previous glue stick (which I wish I had more of...).


Needless to say, this time-consuming project was discouraging and I ended up scrapping the hot glue idea altogether. Instead, I wrapped some white fabric around the entire wreath and will hopefully figure out an alternative idea to the whole Fall wreath idea.

Thursday, September 22, 2011

Organizing a wall

I'm attempting to use up my stash of fabric (or at least make a dent in it) by making projects from the many craft books I've acquired over the years. So I decided to make a wall organizer from Lotta's Simple Sewing book.


We hung it on the wall right when you walk in the door. That way it's convenient to put any mail or coupons right in a pocket. I also threw some pens, tape, and scissors in some pockets too.

The only part I'm not quite happy with yet is the wooden dowel I used to hang it up, it's not quite long enough so the fabric bunches on either side. An easy fix but I need to go someplace that sells them.

It feels good to have a place for things to go when I walk through the door. I was tired of stacks of junk mail just sitting around and this does the trick. Yay for organizing!

Monday, July 25, 2011

Dala Tea Apron


Welcome! If you're not familiar with what's happening over here, you're in for quite a treat. Carina of Carina's Craftblog, Pam of Gingerbread Snowflakes, Hanna of iHanna, and myself are taking part in a Dala Horse Craftalong. And we want all of you to join in the Dala Horse fun! Create something inspired by the Dala Horse, anything you want and upload any pictures to the Flickr group here.

So, for my first Dala Horse project, I used this adorable fabric I found in Japan. I bought it not knowing what I would make with it.


[please forgive me for the horrible lighting of the following photos. Please also forgive the wrinkly nature of the fabric, I still don't have an iron yet!]


And I used up 1/2 of it making this apron.

[Yes, I am fake cooking in this photo]


This is one easy-peasy apron to make. Not only is it cute, but it's practical. I especially love wearing tea aprons when I'm washing dishes. If I had thought ahead to how much I love wearing tea aprons while washing dishes I would have added some oilcloth backing...alas, I just now am realizing this.


I'm working on a tutorial for this very apron, a scalloped-edge, easy-peasy, Dala Horsey apron. So you too can have yourself a Dala Horse apron. You could even use Carina's super-cute Dala Horse fabric!


Now, what else should I make with the leftover fabric? Hmmm...

Sunday, July 24, 2011

Dala Horse Craftalong!


Yup, you heard me right, a Dala Horse Craftalong! Pam of Gingerbread Snowflakes rounded up a few of us Scandinavian crafters to start a Dala Horse Craftalong! So together with Carina of Carina's Craftblog, and Hanna of iHanna, we will be conducting a fun craftalong with all of you crafty folks out there to join in!

So what is a craftalong, you ask? Well, this is how it will work. The 4 of us will all be blogging for a month about Dala Horse themed crafts and offering helpful how-to's and tips. And we're asking you to join in the fun by creating either one of our projects or create your very own! Then once you get started, upload some of your progress over at the Flikcr group here.

Here are a few Dala crafts that you may have seen here on the Pickled Herring before:


The felted Dala coaster


Please join in the fun! I am currently working on many fun projects including a Dala apron, a Dala hot pad, Dala coasters....and so much more! Pam has made some pretty impressive 3D Dala horses along with some ornaments. And Carina has a freakin' sweet Dala embroidery pattern to check out, and Hanna has some sweet photos of the actual city where it all started!

I can't wait to see what all of you come up with, please join in the fun!

Tuesday, February 15, 2011

A cute jumper for a cute niece

This is my 2nd project (1st one here) from the One Yard Wonders craft book I got for Christmas. It's a playful jumper/dress for my niece! Unfortunately, I can't take any pictures of her in it because I won't see her until I'm home from Japan (in less than 2 months, woah!).


This was a very straightforward project and the directions were fairly simple. It didn't take very long either, it could easily be finished in a day. The measurements for the elastic were a little big so I took off about 2 inches to get the jumper to the size I needed.


I've really been enjoying the One Yard Wonders book, it has lots of quick and simple projects. Not to mention it helps me think of ways to decrease my ever-growing stash of fabric. If you're into craft books, be sure to check out Rachel's month-long series over at her blog, Nest Full of Eggs, she's reviewing a different 2010 craft book everyday!

Saturday, February 5, 2011

Echino fabric and a new bag!

One of the best things about Japan is its vast selection of amazing fabrics!

I've especially been loving the Echino fabric. It's funky meets cutesy. It's a bit pricey though so I usually wait until I rack up points on my craft card to get a discount. :) I bought this plum-colored, bird design Echino fabric a couple months ago and finally made something with it!


I got the One Yard Wonders craft book for Christmas this year and used the "folklore bag" pattern for this project.


I've sewn a couple bags this past year while I've been in Japan and this is by far my favorite pattern so far. It's roomy, has a pocket and a magnetic closure which I absolutely love.


The magnetic closure was way easier to install than I was anticipating. And it's so convenient! It took me 2 days to sew the bag but could easily be finished in an afternoon, I just didn't have a huge amount of time when I started.

When I went to the craft store to pick up the magnetic closure I saw these fabrics 1/2 off!! I had my eye on that tree fabric for a while so I bought 1 meter of each it was such a good deal!


I'm going to make a little dress/jumper thing-a-ma-bob out of that flowery fabric for my niece, another pattern from the One Yard Wonders book.


What have you been making lately?