

Welcome back, readers! Today is Day 3 of the series and I am so excited that Pam from Gingerbread Snowflakes is back again this year! Pam's blog is chock full of fun holiday crafts, recipes and history, make sure you check it out! Not only is Pam one of the sweetest bloggeres in blogland, but her love of things Scandinavian is what helped me find her blog! Pam can be found on Instagram: @gingerbreadsnowflakes, Ravelry, and Flickr. Today Pam is going to share how to make these adorable Scandinavian luminaries!

As always, I am thrilled to be asked again this year to participate in Kathryn's 12 Days of Scandinavian Christmas! I love that she takes the time during this incredibly busy season to bring us beautiful tutorials and foods to add to our enjoyment of the 12 Days of Scandinavian Christmas! I look forward to visiting as much as I look forward to being a part of it!
My Christmas celebrations are influenced primarily by the unique customs I enjoyed as a child growing up in Santa Fe, NM and by my deeply held attraction to all things Scandinavian. As often as possible, I try to craft decorations that reflect something taken from both cultures and so this year, I am sharing Scandinavian Luminaries.
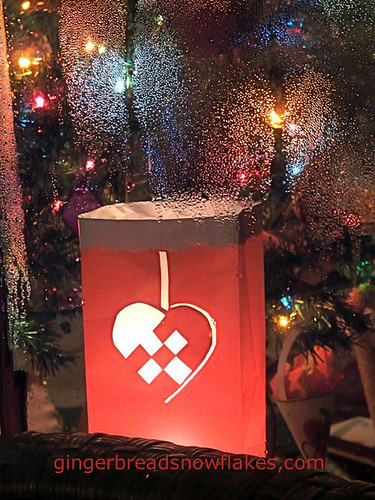
It is customary in most Scandinavian households to place a candle or a lighted paper star - some kind of light - in the window to light the way for visitors. It is also customary to hang hearts in the windows as a sign of welcome. In New Mexico at Christmastime, luminaries (known as farolitos in Santa Fe and Luminarias elsewhere) were first placed along pathways to light the way to the manger. However, these days they are placed on roof tops, walls, window sills and along driveways and pathways - a brilliantly beautiful festival of light to welcome Christmas.
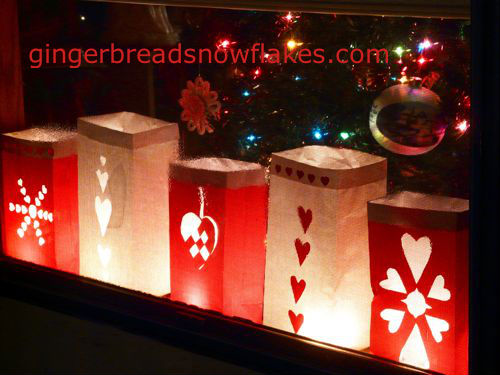
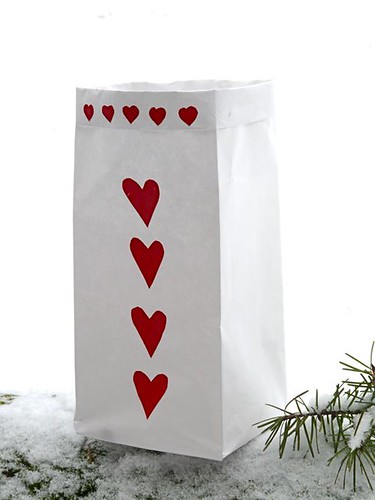
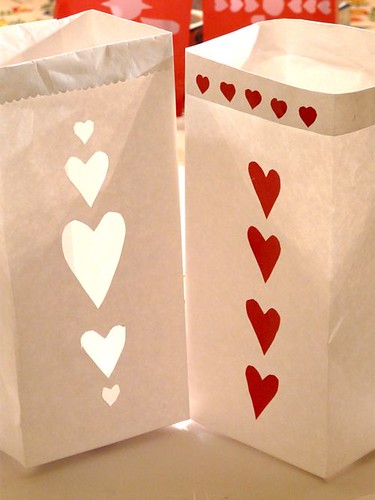
So! Blending the two together - Luminaries in Scandinavian red and white decorated with hearts! I recommend they be used outside. But if you remain in the room and keep an eye on them, you could place them in the windows.
If you wish to use them inside, I recommend purchasing small clear glass votive holders and placing a tea light in them. Then there should be no worries! But as always it is a wise precaution to remain in any room in which there are candles burning.
I am offering different options for the "making" process. Luminaries take very little time to make and as you can see deliver a big payload of cheer!
HOW TO MAKE LUMINARIES
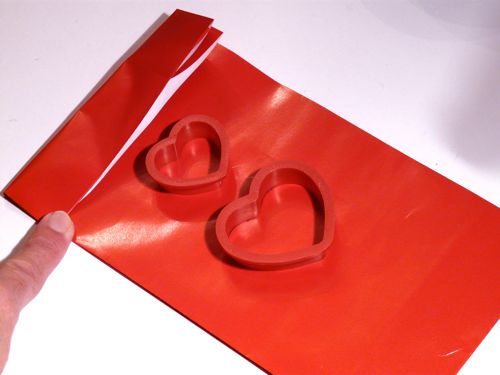
Option #1: The easiest option - purchase red and white bags in a local party store. (I actually found mine at a local Dollar Tree.)
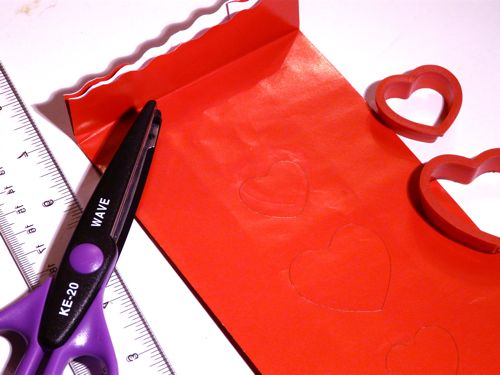
2. Gather a few heart shaped cookie cutters and after deciding on a design, use a pencil to trace around them.
It is necessary to fold over the top edge of the bag - this keeps the bag open! Before marking your design on the bag, fold the top down about 1" as shown. (This will aid in the placement of the design.)
And if you like, use decorative edge scissors to create a pretty edge along the bottom of the folded edge.
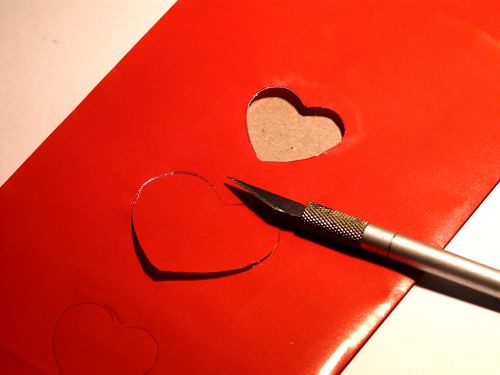
3. Slip a couple layers of cardboard inside the folded bag and use an craft blade to cut out your hearts. (Scissors will crease and crinkle the paper.) Save the little hearts you cut out! I will show you why in a moment!

4. Once the design is cut, fold the top of the bag down, add a little sand or dried beans to the bottom to give stability (and keep them from blowing away), nestle a tea light in the base material and your luminary is done!

Make them all the same or make each one different!
Option #2: Make your own bags using freezer paper! Most crafters have it on hand and it is so easy to make a bag!!!
For that matter, you could use the same method to make your own red bags from wrapping paper if you happen to have some on hand!
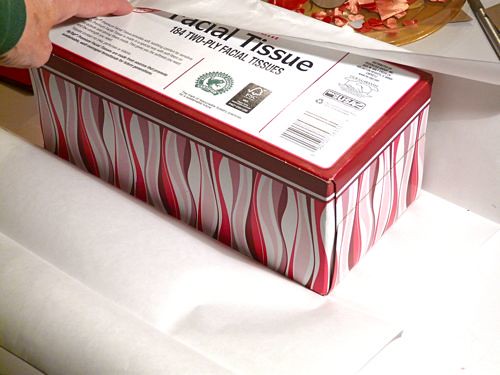
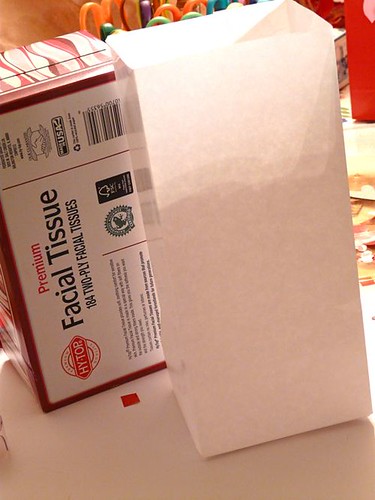
1. Cut a piece of freezer paper big enough to wrap a large count tissue box - as if it were a gift!
2. Now wrap your tissue box in the freezer paper just as you would a gift! I usually allow a little less room at the "top" and am very generous on the "bottom"!
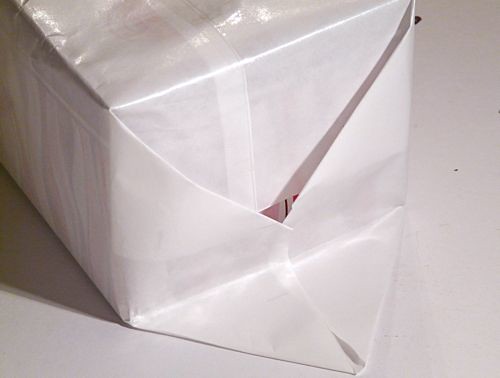
3. Simply tape the paper to secure the fold flaps on the "bottom".
Remove the tissue box and - you have a luminary!!

If you want more design flexibility than your cookie cutters allow, simply cut hearts from scrap paper, trace on a bit of cereal box weight cardboard, and cut them out! Heart templates!
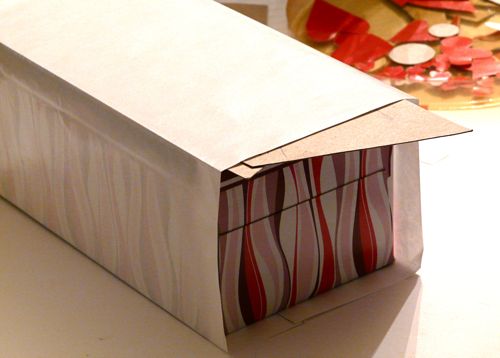
4. The work of transferring and cutting the design is easy to do - simply place the tissue box inside the bag, and then slip in a couple pieces of cardboard as shown.
Now trace your heart templates and cut out along the tracing lines using a craft knife.
OR, if you are making red bags at the same time, save the red hearts and glue them onto the surface of the white bags! No further cutting necessary! White bags will glow beautifully even uncut. And during the day, the red hearts look very pretty on white bags!
One thing you should know about paper luminaries. They can get wet sitting outside on snowy sidewalks! In Santa Fe, most residents only burn them on Christmas Eve. I have found that covering the entire bottom with wide cellophane packing tape helps as a moisture barrier! But, they are not designed to be used outside indefinitely. In dry weather you could get two or three nights out of them - especially if the bottom is sealed in tape.
However, if you want to use them for the whole Christmas season, I suggest placing them on covered patios or in windows (using the clear glass votive option with the tea lights.) And as there might be some condensation around the windows, sealing the bottom would be a good precaution.
And now - God Jul! Glædelig Jul! Hyvää Joulua! to all!
Thank you, Pam! Come back tomorrow to hear about pickled herring from my Dad!!
Wonderful! I would like to try these ~ I have some white bags all ready to go, but what a great idea you show using a tissue box!
ReplyDeleteOnce again, thank you Kathryn not only for all your hard work at this busy season to bring us the 12 Days of Scandinavian Christmas, but also for inviting me to participate. I look forward to it every year - all year long!!
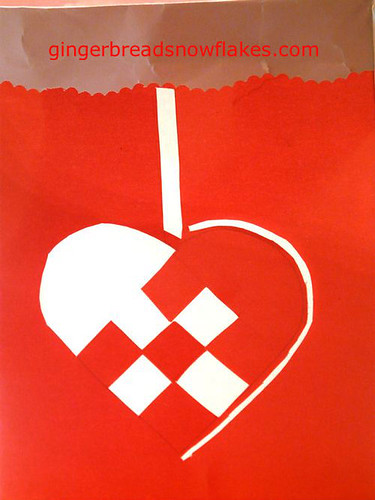
ReplyDeleteThese are beautiful, I love the cut out woven star, I will try these. I did not realize the connection to Santa Fe, I would love to see New Mexico at Christmas time one day.
ReplyDeleteThese are such pretty luminaries! I love the option to make them yourself from freezer paper!
ReplyDeleteOh, I love these in your windowsill! What a perfect idea! And such wonderful directions, as always :-).
ReplyDeleteYOUR TUTORIAL was easy to follow step-by-step, so thanks, PAM. I plan to make several luminaries for Scandinavian Christmas decorations. I have a pack of 25 white heavy paper small bags, ideal with bright red motifs. The BEAUTY lies in the simplicity, right? Pam, I recently signed up for your e-mail updates to your blog, Gingerbread Snowflakes, so I'm anxious to see photos of your continued CREATIVITY! MERRY CHRISTMAS from Sarah Helene in Minneapolis
ReplyDelete