

Welcome back to Day 4 of Scandinavian Christmas! I am so happy to introduce to you all to one of the nicest bloggers in the blogiverse, Pam. Pam blogs over at Gingerbread Snowflakes, posts photos on Flickr here, and has a whole host of awesome Scandinavian related posts on her blog; including this one about the Julbock and this one about the adorable St. Lucia set she made. She covers a lot of ground during the holiday season and blogs about all sorts of Christmas traditions from around the world. This is Pam's second year participating in the Scandinavian Christmas series and I am so glad to have her share all about how to make a Sami Christmas Elf!
How to Make a Sami Christmas Elf
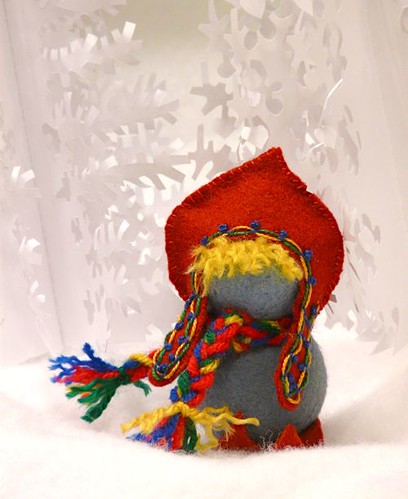
How to make a tiny Sami Christmas elf!
The Sami people inhabit the arctic regions of Norway, Sweden and Finland. They are true indigenous Scandinavians living in what was once known as Lapland and follow reindeer herds across the northern reaches of Norway to Finland and into Northern Russia season to season.
I wanted a small Christmas Sami elf to add to my collection of Scandinavian elf like creatures (Tomte, Nisse, Yule Lads...) and this is how my little Sami was made!
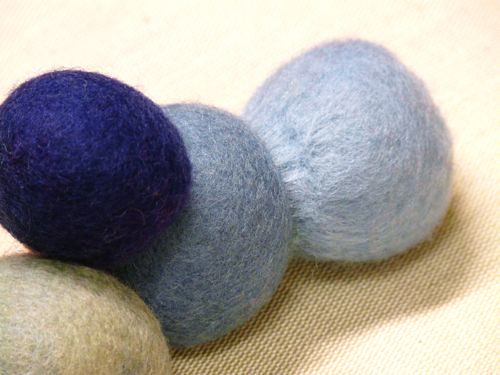
1. Begin with two felted balls 1 3/4" dia. and 1 1/2" dia. Mine are wet felted using this method but the balls could also be needle felted as well.
Above - wet felted balls still waiting to be used - leftovers from a felted ball making marathon last year. I decided the pale blue balls would reflect the frigid wintery weather above the Artic Circle.
2. Use a felting needle to attach the smaller ball (head) to the larger (body).
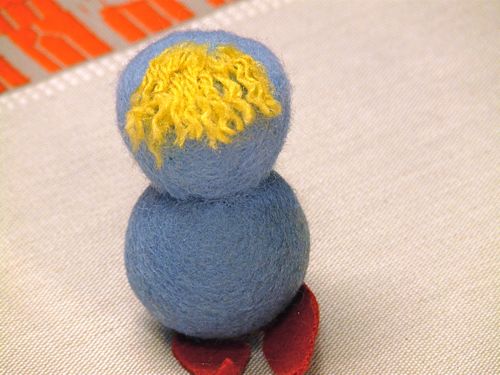
3. Needle felt a few pieces of golden yarn to the head and then unwind the twist and fluff.
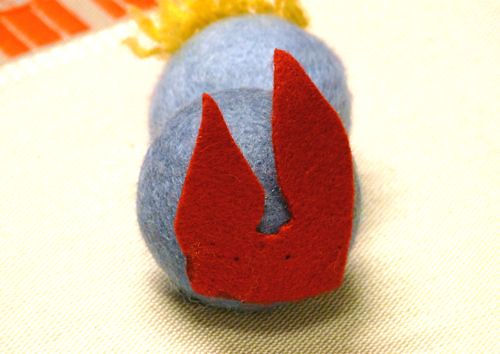
4. Cut a piece of felt to look like two little pointed shoes and glue to the bottom of the body. The pointed tips of the felt "shoes" can easily be coaxed into a curl.
5. I would recommend glueing a small disk of cardboard to the bottom of the body before glueing on the "shoes" OR glue the disk to the bottom of the shoes after glueing them to the body. This step should help provide stability. My Sami likes to tip. The little disk solves the problem.
Sami people use beautiful, saturated, bright colors in their clothing so I have used that as a guide in creating the scarf and hat.
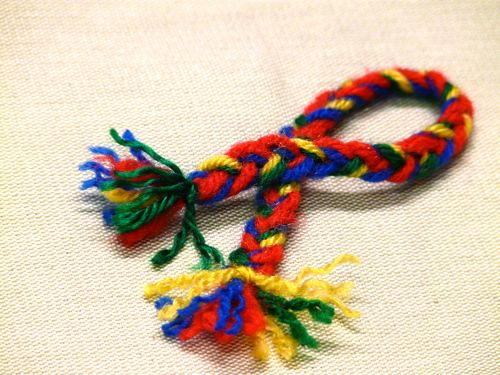
6. To make the scarf, braid together six 14" strands of worsted weight yarn. I used two strands of blue, two red, one green and one yellow. Braid together until you have the length of "scarf" you wish. Mine is 10" including the fringe.
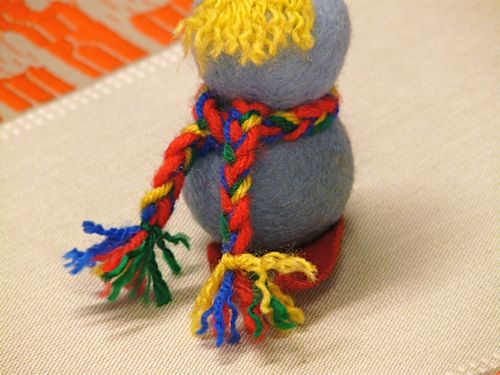
7. Tie the scarf around the "neck".
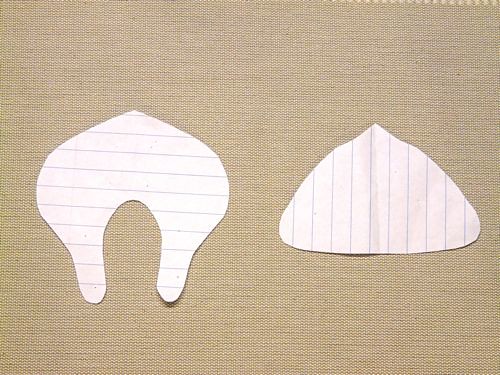
8. Draw a front and back hat pattern similar in shape to those shown. Both the front and back measure 3" across the widest part. The inside curve of the front can be cut a little larger if you wish to show more of the little face.
9. Cut the two hat patterns from felt and stitch together using an overhand stitch along the sides and top leaving the bottom edges open.
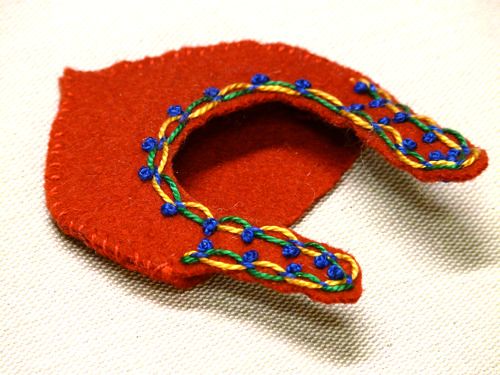
10. To create the hat embroidery, I stitched a double whipped running stitch - which means threading floss twice through the running stitch foundation so that the threaded stitches form a chain.
11. Then I accented with a few French Knots. Again, I used blue, yellow and green to reflect the colors used in Sami clothing.
Of course, you might like to embellish with different stitches! But do stick to blue, green, yellow and red floss.

beautiful job on the embroidery on the hat !
ReplyDeletePam certainly is one of the nicest bloggers in the blogiverse. I enjoy her blog and her work very much. The Sami elf is just lovely.
ReplyDeleteOh my goodness Katherine - and KJ! What a lovely compliment. You have both just made my day brighter!
ReplyDeleteI am thrilled to be asked again to be a part of Scandinavian Christmas.When I made the little Sami, I really wasn't planning to share how to make her as she was just for me! But when your request came I decided to share.
I am enjoying the Scandinavian Christmas series so much already! Eagerly awaiting every post! It's like having another advent calendar to open every day!
I love this. Thank you for the tutorial.
ReplyDeleteThis so darling glad you shared great JoB...
ReplyDelete