Showing posts with label dala horse. Show all posts

Sunday, September 14, 2014

5 Scandinavian Crafts

Lately I've been doing a little reminiscing. So, I decided to do a little roundup of some of my favorite Scandinavian-themed crafts that I've made over the years.

One of my all-time faves has definitely been the tomte tutorial! I made this sucker almost 4 years ago (get out, how does time do that?!)


Next up are these super easy + fun glass magnets. You pick out what you want them to say! I [obviously] chose Swedish words for fun.


And for all the babies in your life, this tutorial for how to stencil using freezer paper is fun. You can stencil anything you that can cut out, and ironing the freezer paper onto the onesie makes a nice clean line. It's basically the poor-mans version of screen printing.


These ornaments have been one of my favorite Christmas items I've made! I love that I got to incorporate my mom's old cookie stamps into a craft. And they're super cheap to make to boot.


And last, but certainly not least, is the Scandinavian ribbon headband tutorial. I love making these for the craft fair I do every winter here in Los Angeles. They're fairly quick to make, and the options are endless with all the fun ribbon out there in the world!


So there you have it, folks! 5 of some of my favorite Scandinavian-themed crafts I've made through the years. What are some of your favorite Scandinavian crafts that you've made?

Saturday, May 10, 2014

Simple Ribbon Headband Tutorial


It took me over a year, but I've finally put together a tutorial for the ribbon headbands! These are super simple and quick, and would be a great beginner sewing project. You can use any width of ribbon you'd like, depending on what kind of look you prefer.


I [obvoiusly] used Scandinavian ribbon. You can find a variety of Scandinavian-style ribbons on Etsy [TrimKo has quite a few options], or you can buy whatever type of ribbon you find cute at Michael's or Jo-Ann Fabrics.

You will need:
15 inches of ribbon (width of your choice)
15 inches corresponding width, backing ribbon (I used plain black/navy grosgrain)
5 inches of 1/4" thick black elastic
Scissors
Invisible thread (not pictured)

Note: These headbands are made "one size fits most". Shorten your elastic length if you are making a headband for a very small child.


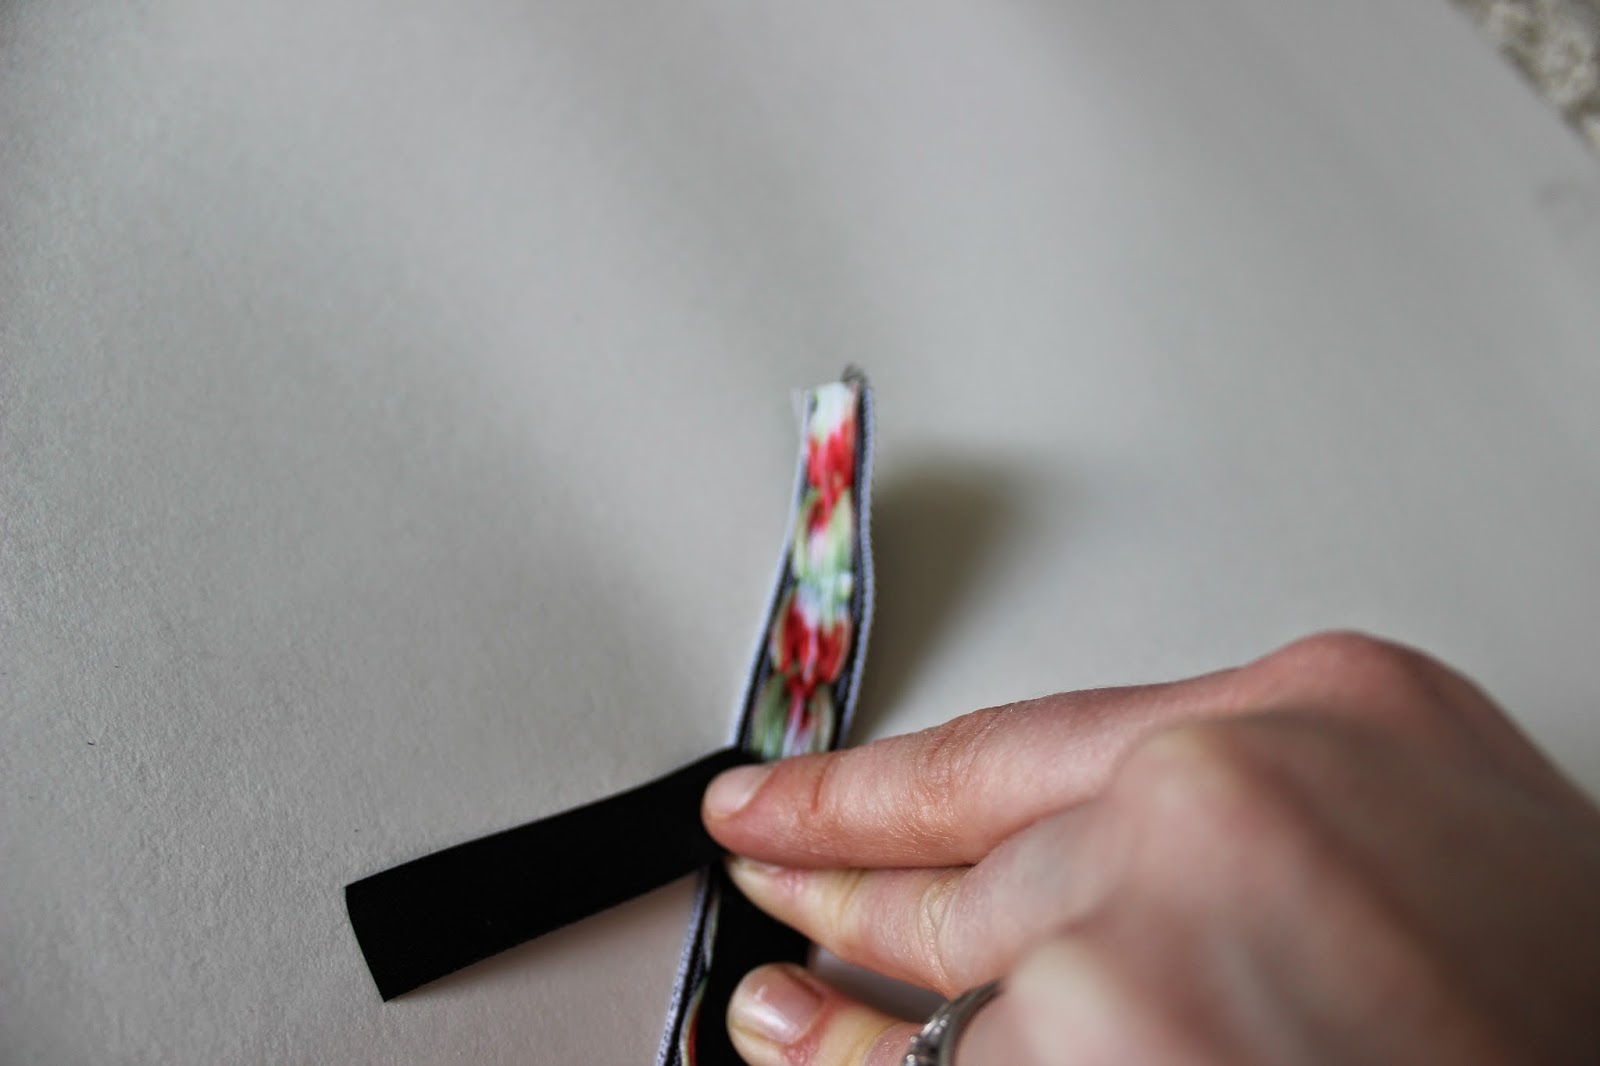
To start, place the wrongsides of your main ribbon and backing ribbon together.


Fold under the end pieces of the ribbon 1/2", and tuck 1/2" of your elastic between the two ribbons. Secure with pins and sew back and forth over the elastic, using your invisible thread. You will want to make sure you do this around 4 times to ensure your elastic won't fall out.


Once your elastic is secured on one end, sew along the outside edge of both sides, sewing together the two pieces of ribbon. Leave a 1-inch gap at the end so you can fold under the ends. Repeat the folding and elastic sewing on the other end. Make sure your elastic isn't twisted before you sew the other end! I may or may not of sewed a couple with twisted elastic...oops! 


That's it - now you can wear your new headband or give it as a fun gift!


And if you aren't feeling very crafty, you can always purchase one from my Etsy shop here!

Wednesday, April 30, 2014

Dala Horse Soap: Tutorial


It's no secret that I'm a little obsessed with all things Scandinavian, including Dala horses. So when I received this Dala horse baking pan from IKEA that came with a mini Dala horse pan, I started brainstorming what I could make with it. I've always wanted to try my hand at soap making, and figured what would be cuter than little Dala horse soaps! I decided for a clementine-poppy-seed soap, the poppy seeds acting as a great way to exfoliate, and am quite happy with how they turned out.

Want to make your own? You will need:

Shea soap base, can be found at Michaels - (use a 40% off coupon  and it's only $6!)
Soap molds - I used my small Dala horse pans from IKEA, you could also use mini-muffin tins
Scents/add-ins - 1 tsp clemetine zest and 1 tsp poppy seeds
Coloring - optional (I didn't use)


Break off 6 cubes of the soap base, which is just enough to make 2 Dala horse soaps. Heat soap in a microwave-safe bowl for 30 seconds. Stir and microwave again in 10-second increments, stirring in between, until it is completely melted.
Stir in your scents/ingredients, and any coloring if desired.
Pour directly into your molds. Tap lightly on surface to release any air bubbles.


Allow to set for at least an hour before removing from molds. If your molds don't bend (like the Dala horse pans), you may need to pry one edge out for it to release completely. I used a toothpick and it barely left a mark.


Lather up and enjoy!

Thursday, March 13, 2014

Dala Chalkboard, take two

I've been doing quite of bit of tinkering in the ol' craft room lately. And I decided to see what the Dala chalkboard would look like with ribbon to hang instead of just the back hooks.  I really like the ribbon because now it is reversible! Plus, ribbon is just cute.


[purchase via etsy here]

I hung this up in the craft room/office and I've been leaving Ryan little notes. I'm thinking about hanging it on our front door, in fact, I just might. 

Monday, December 2, 2013

Happy Advent + Fall in Review

Happy Advent season, everyone! It's my favorite time of year! Caryn and I finally finished our Advent calendars that we started at the beginning of the year, and now mine is happily hanging in my front hall. And Ryan has happily been eating the little candy canes that are in the pockets!

A lot has happened this Fall, hence the lack of blogging. Last weekend I turned the big 3-0. Ryan took my to Solvang (an adorable Scandinavian town in Southern California) to celebrate. It was the best! Here we are at Buttonwood Farms Winery:


And the weekend before that, my crafting partner Beth and I took the OC Lucia fair by storm! This was our first year at this fair and definitely learned a lot. We were super busy all of November just trying to get our inventory up. Overall, the fair went well and we are really looking forward to the Los Angeles Lucia fair coming up on December 15. If you live in the area you should really check it out, they do a bang up job with the program.


One of my new projects this year are these Dala Horse chalkboards! I love that I can change the sign for any season. I'm going to hang one that says God Jul for Christmas. I also just added this item to my Etsy shop!

(I know the picture isn't the best, I'll try to get a better one soon)

With work, roller derby, and crafting, this Fall has been crazy busy for me! But I am so excited that Christmas is around the corner! And before you know it the Scandinavian Christmas series will be here! Starting December 13, get ready to hear from bloggers from all over about a great Scandinavian tradition, craft, or recipe. And if you know anyone that would like to participate, I'm still looking for a couple more entries so e-mail me! 

Happy Advent! 

Thursday, October 17, 2013

Fika + Crafting

Happy almost weekend, people!!


As you can see in the background of my fika, I've been a little crafting crazy lately! I'm really trying to up my craft inventory for the upcoming fairs...they'll be here before I know it! 

One of the projects I've been working on are these "Kissing Dala" magnet sets. I'll have to share the packaged version later. I've made them in varying colors as well - my favorite is the navy and gold.


Besides the Dala magnets, I've been making a few other versions of magnets and more ribbon headbands. My crafting partner and I recently bought a Yudu screen printing machine and we're stoked to get some new merch out there! We just have to figure out how to use it...it's pretty intense. Ha.

In other exciting news, the Scandinavian Christmas series is just around the corner! I would love for you to participate - please e-mail me if you'd like to submit a post of a favorite Scandinavian Christmas tradition, craft, or recipe. 

That's all for now! 

Wednesday, May 15, 2013

Pacifier clips

A few of the pacifier clips I've been cranking out...my favorite are the vikings. It's from ByBora Designs...isn't it adorable!?

 
I'm selling these this weekend at the Kingsburg Festival.
 
I will probably be off the bloggin bandwagon until next week. We leave Friday right after work to head to the fair.
 
Have a great weekend!

Sunday, May 5, 2013

Headbands

Just wanted to pop in and show you all how the headbands are coming along!
 
Here are some of the headband designs I have made so far:


All of my ribbon for the headbands I either been bought on Etsy or my mom has found at various Scandinavian stores over the years (thanks, Mom!). I backed them with a solid color ribbon and add elastic to loop them together.

My favorites are the Dala horses on blue and the red hearts with blue flowers and green vines. After all of the craft fair craziness I will post a tutorial on how to make them!

Hope you're enjoying your weekend!

Sunday, April 28, 2013

Coasters to the max

With the Kingsburg Festival just around the corner, I've spent the majority of my weekend creating! It has been wonderful! I am really enjoying the creating process for this fair, more so compared to the prepping/creating for the Lucia fair. I think I'm not putting as much pressure on myself for this one and going into it with an attitude of, "Hey, if I don't sell it, I can keep it for myself!" 

My newest project has been tile coasters. They're a little tedious to make, but I think they're turning out pretty awesome (not to toot my own horn or anything...). I transferred different images onto kitchen tiles, coated them with polyurethane, and still have to add a layer of cork to the bottom. And voila! Neat little coaster sets. One of my favorite sets by far are the vintage maps of Scandianvia (shown below). And seeing as Ryan is quite a geography nerd, I will definitely be making us our own set after the craziness of the fair.


Other favorites include these whimsical designs I got from a modern Swedish cookbook I own.


And, these images from a vintage Swedish cookbook I scored at a second-hand store for 50 cents at a fair a couple years ago!!


I'm loving the crayfish.


I couldn't help but think while I was making all of these how handy they will come in for Fika Fridays!

All in all, it has been a very productive weekend. I am feeling great about the progress I've made and am now trying to brainstorm ideas for decorating the craft booth itself. We have to provide our own tables and such, so I am trying to figure out a good layout along with some cute decor. Any ideas welcome! 

I hope you had  a great weekend!

Friday, December 21, 2012

Scandinavian Christmas: Day 9


Day 9 of Scandinavian Christmas is here! This series is flying by. Wow. Typically, everyday of Scandinavian Christmas is filled with a guest post, however, today I will be sharing a fun tutorial with you all!


You will need:

Clothing or fabric to stencil on (I used onesies)
Freezer paper
Very sharp scissors or Xacto knife/cutting mat
Fabric paint
Iron

First, pick out what outline you'd like to stencil. I'd recommend a basic outline to start with until you get the hang of it.  I chose a viking hat and Dala silhouette to put on onesies.

Tape your outline to the matte side of the freezer paper. 


Cut out the shape through both layers of paper.  You just made your first stencil!


Place the shiny side of the freezer paper on the fabric.  Place where you want your design to show. Iron onto fabric.  This is the awesome part about freezer paper; it creates a great seal between the stencil and fabric which makes for clean lines when you remove the ironed freezer paper.

Once your stencil has been ironed in place, use your fabric paint to paint the area.  Be careful not to go outside of the stencil square.  This may sound obvious...but I may or may not have done just that (hint: I did).

Allow paint to dry and apply 2nd coat if needed.  Make sure paint is completely dry before removing stencil. Viola! Stenciled onesies!


Thanks for checking out the Scandinavian Christmas series! Check back tomorrow to hear about Astrid's awesome decorating tutorial!

Tuesday, December 18, 2012

Scandinavian Christmas: Day 6


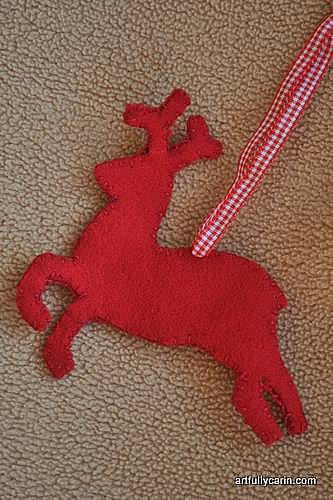
Welcome to Day 6 of Scandinavian Christmas! I am so happy to have Carin back this year to share a great tutorial for some super-cute and super-Scandinavian Christmas ornaments! Carin has a neat blog called Artfully Carin where she documents her various artistic ventures.  She is a talented mixed-media artist and Swedish to boot. Carin  participated in my very first Scandinavian Christmas series and I am so glad she's back for more this year! 


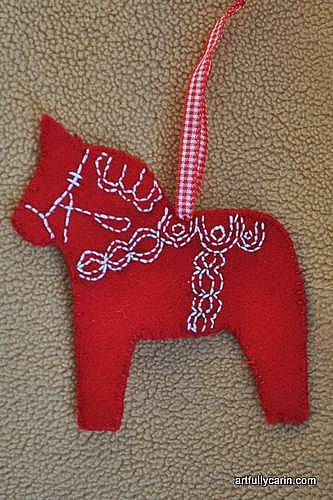
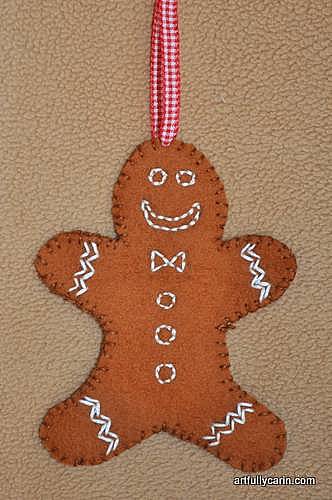
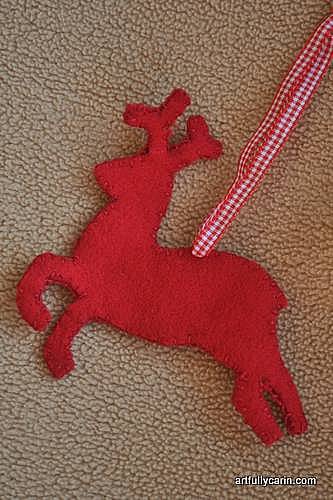
 Hi everyone, First off a huge thank you to Kathryn for letting me be a part of Scandinavian Christmas yet again. I shared recipes for knäck and ice chocolates back in 2010, and I'm so pleased she asked me to come back this year. I'm Carin, a Swede living in the UK. These days I feel more British than Swedish, but Christmas always brings out the Scandinavian in me. For the past few years, I've added a new Scandinavian-inspired handmade ornament to our tree each Christmas. One year it was felt hearts, another felt stars. This year I'd planned to make embroidered felt Dala horses, but when Kathryn asked me to join Scandinavian Christmas again, I went a bit crazy and added gingerbread men and reindeer to the mix too. All for your crafting pleasure, you understand ;-) Let's begin. 

You'll need: 


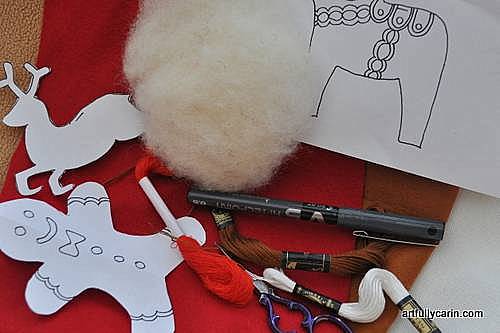
 *Red, white and brown felt *Red, white and brown embroidery floss *Red or white ribbon, or twine *Ornament template *Good scissors *Pen or pencil *Needle *carbon paper (optional) *Stuffing (optional) *Cardboard (optional) Instructions: 


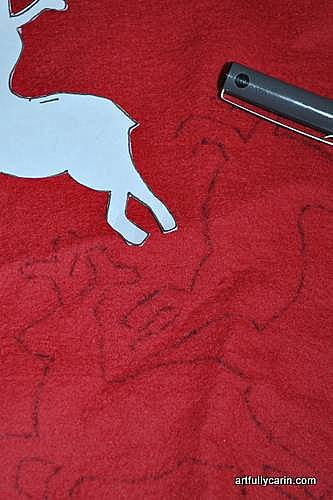
 1a: For those using carbon paper: Print the template above. If you want to make a double sided Dala horse, print two copies, one of which is back to front (on my PC, this can be done by choosing printer properties> reverse order). This is so the embroidery is facing the right way on the back of the ornament. Trace designs onto felt and cut out. You'll need two of each. 1b: For those doing it freehand: Cut shapes from template above, then carefully draw around the shapes with your pen or pencil. Cut out 2 pieces of each shape. Add the pattern freehand on one of the two pieces. If you want a double-sided Dala horse, face the second piece the other way and draw the design to ensure it faces the right way on the back of the ornament. If you want to stuff your ornaments, or make them stiffer by adding a piece of carboard in the middle, add a slight seem allowance all around. Personally, I didn't find either of those necessary for these.


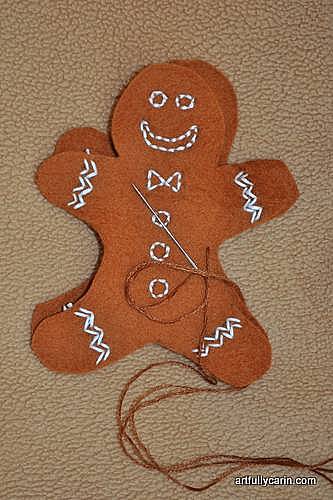
 2. Cut a length of embroidery thread, knot one end, and carefully embroider along the lines of the pattern on one of the shapes.


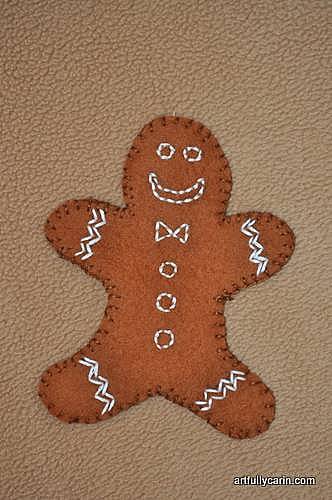
 3. Put the two pieces together, and tidy up the edges if needed, then stitch the two pieces together (I used blanket stitch, but straight stitch or back stitch works too). 


4. Thread your ribbon or twine through the top of the ornament, tie knot, hang on your tree and enjoy your handiwork. Thanks again Kathryn for letting me be a part of Scandinavian Christmas 2012. God Jul och Gott Nytt Ã…r (Merry Christmas and a Happy New Year) everyone!

Another huge thank you to Carin for sharing such a fun tutorial! Come back tomorrow to check out a tasty recipe from Erica!

Monday, December 10, 2012

Lucia Festival in a nutshell

Well the big day was yesterday and it went great! My friend Beth and I had a booth at the Los Angeles Swedish Christmas Fair and we had a blast!  We named our booth, "The Swedest Thing".  We will be uploading items from the craft fair, as well as new items, into our Etsy shop soon.  

Since it was our first year at this fair, Beth and I were definitely nervous going into it. We learned a ton and now we know what we will do differently in the future. We also didn't get much sleep the night before as we were frantically putting things together and trying to get more crafting done...lesson #1 learned: start making this earlier.  

Me and Ryan in front of our booth (Ryan is very excited about the day!):


Here are Beth and Dave in front of our booth.


A full picture of our booth with Ryan the viking behind it.


The Lucia processional and program happened twice throughout the day.  Here was one of the only pictures I got to take of Lucia.  They sang a medley of songs after they processed, it was beautiful!


Here is a picture of more craft booths from the fair.  There were all sorts of booths there this year.


 Here are a few more shots of our booth up close and personal. We had double-wine tote bags, aprons, hand-stenciled tote bags,  hand-etched glass items with Swedish words/decals:


And we had various ornaments, headbands with Scandinavian ribbon, lingonberry headbands, hand-stenciled onesies, and more!


These hand-stitched felt Dala ornaments were a huge hit and sold like hotcakes! Beth made them in a variety of colors and did an awesome job:


I got to walk around a couple times and check out other booths and the token item I bought this year was this second-hand, hand-embroidered runner.  Isn't it beautiful?!


Overall, we had a great turnout for our booth and we are so glad we got the opportunity to do it this year! We are already looking forward to next year's fair when we can have more time to prepare and have a wider variety of items.  We had such a great experience and are so thankful for all the support from our friends, family, and husbands!

And I definitely couldn't have done it without the help of my sister, Caryn, and her wonderful daughter, Hannah, who came over all afternoon on Saturday to help me finish up last-minute projects.  Isn't she just precious?!  


So that about sums it all up! Thank you to all of you out there who helped me with ideas for the fair and all your support.  You guys are the best!

Also, get ready for this Thursday, December 13, as it is the kickoff to the
Scandinavian Christmas series 2012!
You won't want to miss all the awesome guest posts about the best Scandinavian Christmas traditions, crafts, and recipes!

Happy Monday!