Wednesday, December 15, 2010

Scandinavian Christmas, Day 4


Today I want to give a huge welcome to Astrid over from Red Red Completely Red. I was first drawn to Astrid's blog a while back by her Scandinavian style, felt-work, and unique projects (she's done some super amazing stuff with chalkboard paint!). She also makes these adorable "Travelling Tillberries," softies made from recycled items like sweaters and potato sacks. My personal favorite is the fox!

Astrid's grandfather (Morfar) is a watercolor artist who taught Astrid to add red to all true works of art. Astrid fully embraces this and tries to have a bit of red in everything she creates.

Astrid's Danish heritage comes from her mother's side, her Mormor being from Denmark. She lived in Sweden when she was little, and later lived in Denmark for 4 years. Needless to say, she is enthusiastic about keeping her Danish heritage alive, especially at Christmastime!


Our home is rather red for most of the year anyway, but when it comes time for Christmas, we go to the extreme. Red felt hearts draped across the fireplace, red paper cones on the tree, little red birdhouses outside, and hanging in front of the windows, red paper cuts in festive shapes.


Decorating with these beautiful, delicate paper cuts was always a tradition I enjoyed growing up. My Mum, who really kept the Danish culture alive for us, had a lovely collection of cuts featuring scenes with little Nisse boys and girls going sledding, kissing under a tree, and doing all sorts of jolly activities. We would unwrap them, very carefully, and invite them all to join us for Christmas.
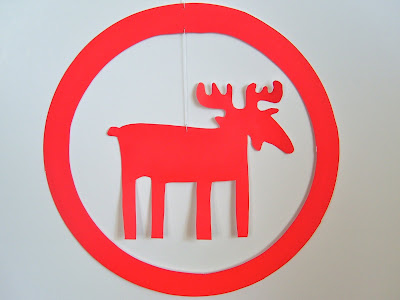

This year, for the first time, I decided to make my own paper cuts. And with just a few simple materials, you can easily add a couple to your home this year, too.

What you'll need:
Several sheets of paper (scrapbook paper works very well)
A craft knife, or pair of scissors
A needle
White thread
Assorted bowls, lids, and decorations to draw around


I like to make paper cuts with a little round border around them. First, we'll make that border. Place a (largish) bowl upside-down onto a sheet of paper.


Either cut around it with a craft knife, or draw around it with a pencil and then cut it out.


You should now have a circular shape.


Now, find a slightly smaller bowl. (Jar lids, drinking cups, and embroidery hoops all work well, too!) Place it in the middle of the first circle, and again, cut around it.


The size of your border will depend, of course, on the bowls you use. But luckily, paper cuts look great when a variety of circles are used together, so experiment with different sizes!


Now, we'll cut out the shapes to go inside the border. I love the simplicity of hearts. Here, I'm using a cookie cutter as a template, but you could use whatever is handy... or draw your own.


Christmas ornaments are also good templates. This year's IKEA reindeer took my fancy. With complicated shapes, it's easier to draw around the shape first, and then cut it out.


Now that you have a border, and something to go inside it, all you need to do is string them together. Thread a needle with thin white thread...


And poke it through the paper, about 1/2 cm from the edge (too close and it will rip easily). Pull the thread through almost all the way, leaving a little tail.


Tie a couple of knots, using the thread on both sides of the hole. Trim the excess thread on the tail, but leave a long strand of thread attached to the needle. You can then repeat this process, sewing your shape to the border.


And get creative with your shapes! Although I didn't feel quite up to freehand drawing any Nisse this year, it was very simple to draw a little fish shape, to make a unique paper cut. Perfect for anyone you know who loves pickled herrings!


A huge thank you to Astrid from Red Red Completely Red! I have to get busy and make some pickled herring paper cuts! :)

Tuesday, December 14, 2010

Scandinavian Christmas, Day 3


Today I'd like to welcome Rebecca over from Roots & Wings Co.! Rebecca's blog is all about how she makes life for her 3 children fun, exciting, and full of creativity! It's full of super creative tutorials (like this one and this one) and delicious looking recipes, check it out!

Rebecca's entire family "seriously hearts Denmark!" :) Her father's side came from Denmark and she grew up with parents and grandparents who taught her all the great Danish traditions. Rebecca loves to share these traditions with her children and has a truly Danish Christmas celebration every year.

Aebleskiver are Rebecca's favorite smorgasbord dish and she is going to share with everyone her delicious recipe! Prepare for your mouth to start watering...

Hi, I was so excited to guest post on Kathryn's blog! I love all things Scandinavian so this was a really fun one for me!

Our family roots go back to Denmark and we love bringing those roots into our celebrations, especially during the holidays! Monday night we got together for our St. Lucia's Day Festivities. My oldest daughter got to be St. Lucia and lead the procession! What fun. I also grew up with our Christmas tree always having Danish decorations on it like Danish Flag Garlands and straw ornaments.


Our favorite Danish recipe is Aebleskiver. Aebleskiver is kind of like a pancake ball that you fill with yummy jellies or sugar. Aebleskiver is something that I have grown up eating, and I just thought everyone ate it! My Father is the one who usually makes it, though we all make it in our own homes as well, now. I love using the recipe that he has used all these years because it has his writing in it to double and quadruple the recipe! This recipe uses every dish in the kitchen. So when we make it we like to make a ton! Plus, we usually make it when the whole family gets together and there are a lot of us! Aren't recipe cards with people's writing in them always the best!?


My Dad tells lots of fantastic stories about Denmark. Not only do we have our roots from there but he also lived there for a few years. So, he can tell us firsthand stories about living there. He also tells us stories about how the Danish people saved the Danish Jews during WWII. If you don't know that story you really have to look into it. It is amazing and heroic! It shows us that every one of us can make a difference when we encounter injustices in the world! My Dad is the best story teller to boot! I love that even my children know so much about Denmark.


We like our aebleskiver with grape jelly in it the best! This is a picture of my Dad a few years ago, enjoying some aebleskiver during a family summer camp that we held one year! It is so much fun to have traditions that tie us to our history and to the family we have now!

Thanks for the opportunity to share something with your readers that is near and dear to my heart!

If you need the recipe written out, here it is:

1/2 C butter, melted
3 eggs, separated
1 C Milk
2 TBL Sugar
1 1/2 C Flour
2 tsp Baking Powder
1/2 tsp Salt
1/2 tsp ground cardamom, if desired
Powdered Sugar
Butter for pan

In a large bowl, blend 1/2 cup melted butter, egg yolks, milk and sugar. In a medium bowl, combine flour, baking powder, salt and cardamom, if desired. Stir into egg-yolk mixture. In a clean medium bowl, beat egg whites until stiff but not dry. Fold into flour mixture. Heat aebleskiver pan over medium-low heat until a drop of water sizzles when dropped into pan. Spoon 1/2 tsp butter into each cup; let melt. Spoon 1 rounded TBL batter into each cup. Cook about 1 minute on each side, using a knitting needle or long wooden skewer to turn balls. If heat is too high, centers will be doughy. Dust each with powdered sugar. Serve hot. Makes 20 pancake balls.

FYI we don't use a knitting needle or skewer. We use two forks to turn the aebleskiver over. Also I never have cardamom on hand so I never add it.

Thanks,
Rebecca@RootsAndWingsCo


Thank you so much for sharing, Rebecca! Be sure to check out Rebecca's blog and creative mind over at Roots & Wings Co. !

Monday, December 13, 2010

Scandinavian Christmas, Day 2


Welcome everyone to the 2nd day of Scandinavian Christmas!

Today's inspiration comes from Pam over at Gingerbread Snowflakes. Check out this adorable little Nisse ornament she made! Pam has all sorts of neat holiday crafts over at her blog, including a complete tutorial for this little fellow and even a cute Dala horse ornament, go have a look!


Pam inspired me to recreate one of the many little Swedish Tomte figures my parents have around our house this time of year. I'm not quite sure if there's any real difference between the Danish/Norwegian/Swedish Tomte or Nisse, does anyone out there know? According to what I've read about them, Tomtes were mythical little farm helpers. The old tale is that back in the day they would either bring your farm prosperity, or ruin if you didn't treat them well.

I made a quick tutorial for how to make your own little (or big, if you prefer) Tomte! Enjoy!


You will need:
  • Red or white felt
  • Stuffing
  • White or gray wool roving (or yarn if you prefer, for the beard)
  • Flesh colored roving or felt (for the nose)
  • Scissors
  • Hot glue gun, or other quick-drying glue
  • Floral wire
  • Styrofoam balls, I used 2 sizes: 50mm and 80mm (a golf ball could also work)
You can vary the color and sizes to what you prefer.


1. First, determine what size triangle you need to cut for your Tomte. Measure around the midsection of the ball and add 1 inch. For example, my small styrofoam ball was 6" around + 1" = 7" total. I made my hats the same height. For my smaller Tomtes my triangle was 7" at the bottom and 7" high.


2. Cut out your triangle and measure it around the ball. Pinch together and pin. Sew across along the entire hat.


3. Trim any excess felt off and round the top corner. Turn right-side out.

4. Cut off a section of your styrofoam ball so it will sit flat. Next, glue a circle piece of white felt to the bottom.

5. Take your floral wire and cover the end with hot glue. Insert to the top of the Tomte hat and squeeze the tip so it sticks. This is so your hat will stay hunched over later.

6. Stuff the hat around the wire. Leave about 1" - 1.5" space for the ball.

7. Cut a circular piece of red felt with a hole in the center and glue it inside the hat.

8. Prepare your beard by pulling small sections of the wool roving off.

9. Working in 2" segments and starting near the bottom of the ball, add hot glue to your ball and start to stick your sections of wool roving on.

10. Work all the way around before starting with the top layer.


11. Do the same for the top layer. Add as much wool as you need so you cannot see the ball. You can lay longer pieces across the top and secure with hot glue. Trim the floral wire down and hot glue the hat on top of the completed ball. Curve the hat to one side, the wire will make it stay in place.


12. Make a ball with the flesh colored wool roving. If you don't have wool roving, you could paint a small wooden ball or cut a small circle from felt. Glue the ball near the edge of the hat so it looks like his nose is peaking out.


Try out different colors like this white and gray-bearded Tomte!

You can make an entire Tomte family!

And they make great gifts! I'll be giving these away to my grandma and brother-in-law's mom, both big Tomte fans.